In Minecraft, water elevators are a great way to get from one level to another within a building or tower without having to go outside. They’re fairly easy to create too! Minecraft players have created some incredible structures using their creative skills. Players use Minecraft’s sandbox mode to create massive structures, recreate historical events, and even make copies of real-life locations like Hawaii. In order to move around these huge projects, players might need an elevator to help them go up and down their large buildings.
Water Elevator Materials in Minecraft
Players must first collect some materials before they can start building their own water elevators. Water will be the primary component of the base; any buildings used for containing the water will serve as secondary components. You’ll also need magma blocks and soul sand. These are the basic building blocks used by Minecraft Water Elevators.


How to Build a Water Elevator
Using a Minecraft crafting table and some basic tools, players can begin the construction of their own tables. In order for an elevator to function properly, each tower must be at least three 1×1 bricks (or 3 if there’s no floor). Leave the center 1×1 square empty. The tower should be as high as the floor of the room where the player wants to go when he uses this elevator.
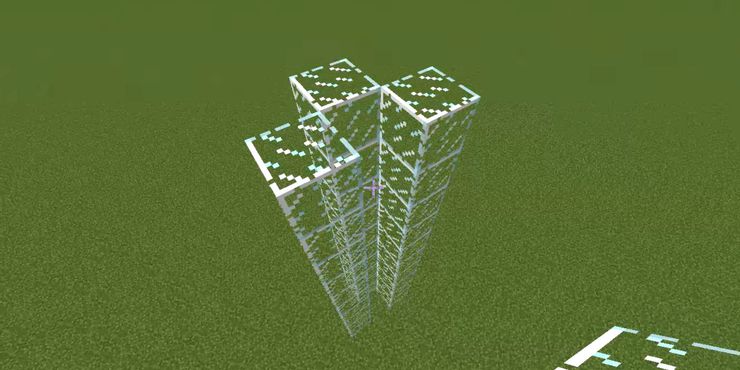
The next step is to place a block on top of the empty space in the middle of the tower. This block is called the “base” of the elevator. It needs to be placed directly above the bottom of the elevator shaft. Once you’ve done that, you can add the other parts of your elevator.
Place two more blocks on either side of the base. This creates a platform for the elevator to sit on. Next, place four more blocks along with a single block underneath the platform. This forms the walls of the elevator’s shaft. Finally, fill the rest of the space with water.
How to Use a Water Elevator
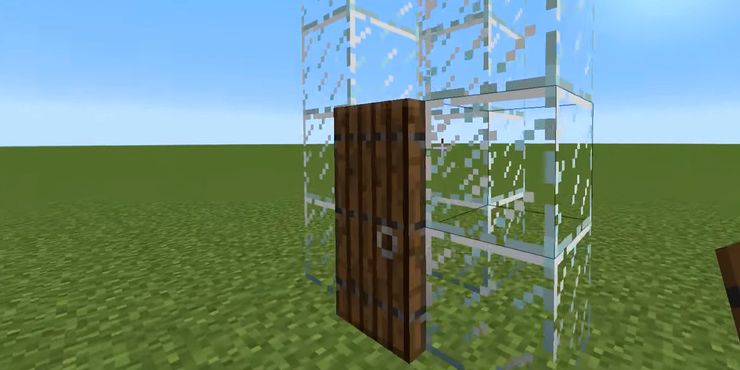
Once the elevator has been built, it can be used. To activate the elevator, simply click on the platform. A door will open and allow you to travel inside the structure. If you want to return to the surface, just press ESC and then click on the platform again.
If you want to take advantage of the elevator’s speed, try placing a few TNT blocks under the platform. When you click on the platform, the elevator will jump into the air. This makes it easier to reach higher areas.
If you want to build a bigger elevator, you can do so by adding more layers. Simply repeat the process of making a platform, wall, and filling the space with water. However, you won’t be able to increase the size of the elevator itself.
Minecraft Water Elevator Tips & Tricks
There are many ways to customize your water elevator. For example, you can change its appearance by changing the color of the blocks. You can also replace the blocks with glass, metal, or stone.
You can also change the look of the elevator by replacing the blocks with different colored blocks. For example, Redstone dust can be used to make the entire elevator glow bright red.
You can also modify the functionality of the elevator by adding traps. Traps can be added to the elevator by placing a trapdoor on the elevator’s platform. Then, you can use a pressure plate to trigger the trap.
Finally, you can alter the behavior of the elevator by using pistons. Pistons can be attached to the elevator’s platform and pumped up and down. They can be used to create ramps or even raise/lower platforms.
How to Make a Water Elevator in Minecraft (Step-by-Step) Guide
Players who have already completed the tutorial may find that the instructions provided here aren’t enough. That’s why we’ve included a step-by-step guide below. We’ll walk through every step of building a simple water elevator.
Step-by-step Instructions:
1) Build a Crafting Table.
2) Place a Block Above Your Platform.
3) Create Walls Around the Shaft.
4) Fill the rest of the Space With Water.
5) Place Another Block On Top Of the Empty Square.
6) Add More Blocks Alongside the Base.
7) Place a Single Block Underneath the Platform.
8) Fill the Rest of Space With Water.
9) Click on the Platform to Activate the Elevator.
10) Press Escape to Return to Surface.
11) Increase the Size of the Structure By Adding Layers.
12) Place TNT Below the Platform to Jump Higher.
13) Replace the Blocks With Glass, Metal, or Stone.
14) Change the Color of the Blocks Using Redstone Dust.
15) Modify the Functionality of the Elevator by Replacing the Blocks With Different Colored Blocks.
16) Add Traps to the Elevator by Placing a Trap Door on the Platform.
17) Pump Up the Piston to Raise the Platforms.
18) Lower the Platforms by Pushing Down the Piston.
19) Use Pressure Plates to Trigger the Traps.
20) Use Cogs to Rotate the Elevator’s Ramps.
21) Attach Wooden Stairs to the Ramp.
22) Use Cogs to Turn the Staircase.
23) Use Cogs to Move the Stairs Forward.
24) Repeat Steps 22 and 23 To Create an Entire Set of Stairs.
25) Use Redstone Repeaters to Connect the Stairs Together.
26) Place a Redstone Torch at the End of Each Stairway.
27) Light the Torches to Complete the Elevator.
28) Replace the Blocks With Other Materials.
29) Customize the Look of the Elevator by Changing the Colors of the Blocks.
30) Use Redstone Dust to Glow The Entire Elevator.
31) Use Redstone Dust To Make the Elevator Glow Bright Red.
32) Use Redstone Dust And A Redstone Lamp To Make the Entire Elevator Glow.
33) Use Redstone Dust, A Redstone Lamp, And A Redstone Circuit To Make the Elevator Glow.
34) Use Redstone Dust In Conjunction With A Redstone Lamp To Glow The Elevator.
After completing the elevator system, players can now use the elevators freely. They can even go back and forth between floors at any time. Players can use these simple building blocks to create any number of different types of structures in Minecraft.