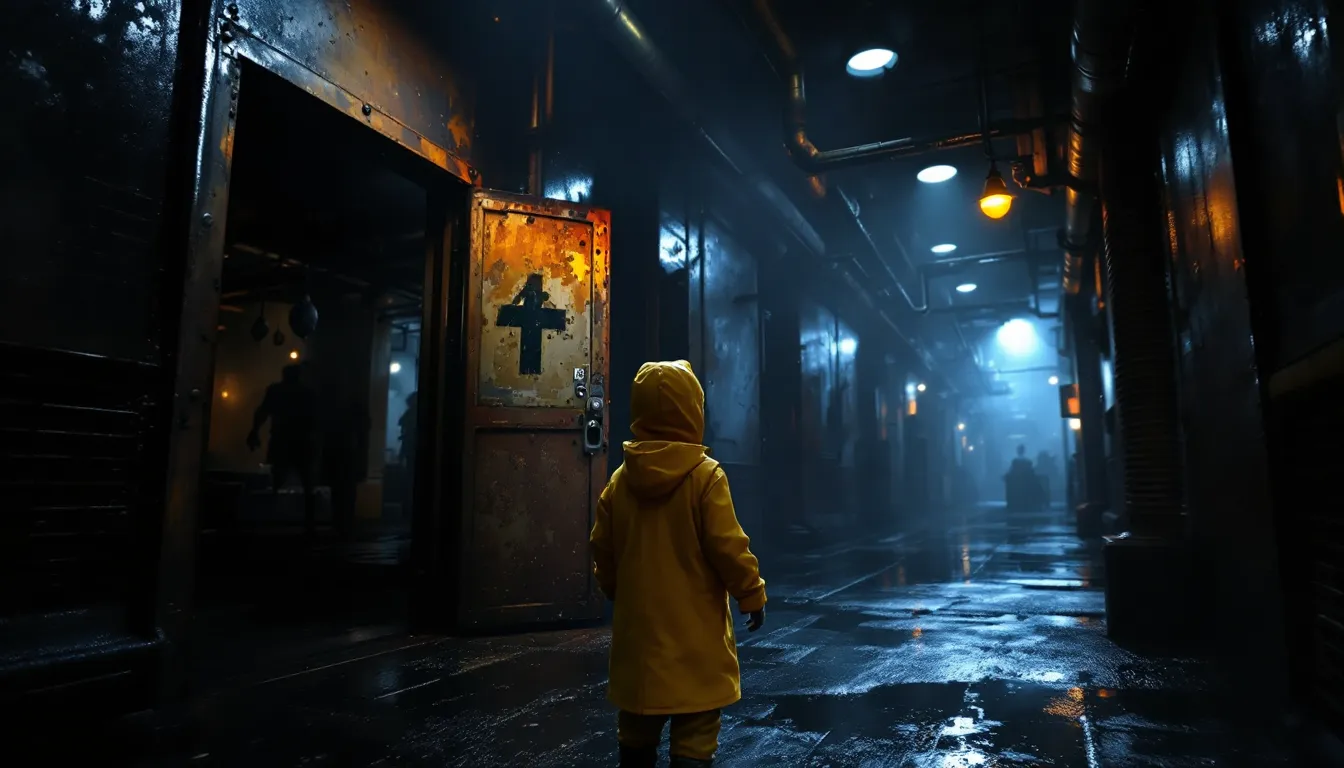
Little Nightmares is a puzzle-platformer that thrives on atmosphere, dread, and clever environmental storytelling. Playing as Six, a tiny child in a yellow raincoat, you’ll navigate the nightmarish vessel known as The Maw, a place filled with grotesque enemies and deadly traps. This Little Nightmares walkthrough breaks down every chapter, puzzle, and encounter to help you survive the journey from the dark Prison to the final confrontation with The Lady.
Whether you’re tackling your first little nightmares 1 walkthrough or refining your route for collectibles, this guide covers controls, stealth tactics, boss strategies, and every hidden Nome location. The little nightmares gameplay demands precision and patience, especially when evading enemies with unpredictable patrol patterns. Let’s jump into the depths of The Maw and find a way out.


Key Takeaways
- Master stealth mechanics and enemy patrol patterns in this Little Nightmares walkthrough by crouching, staying silent, and using environmental cover to evade enemies like The Janitor, Twin Chefs, and The Lady.
- Collect all 13 Nomes and 13 Statues hidden throughout each chapter to unlock the ‘Big Appetite’ and ‘Highly Sprung’ achievements, requiring careful exploration before progressing past major areas.
- Learn precise platforming techniques including box stacking, ledge grabbing, and chandelier swinging to navigate The Maw’s deadly traps and vertical sections in every chapter.
- Use mirrors as your primary defense against The Lady in Chapter 5 by positioning them to reflect her image and create escape windows during her aggressive teleportation attacks.
- Optimize your speedrun route by memorizing enemy patterns, skipping non-essential animations, and managing your ten allowed deaths strategically to achieve the sub-60 minute ‘Hard to the Core’ achievement.
- Complete all five story chapters sequentially to uncover the ambiguous ending where Six absorbs The Lady’s power, leaving her fate intentionally unclear for interpretation.
Getting Started: Essential Tips Before You Begin
Controls and Basic Mechanics
Little Nightmares uses straightforward controls but demands precise timing. Six can walk, run, crouch, jump, grab ledges, climb, and interact with objects. On PlayStation, X jumps, Square grabs/interacts, and Circle crouches. Xbox uses A, X, and B respectively. PC defaults to spacebar for jump, E for interact, and Ctrl for crouch.
Crouching is essential for stealth. Enemies like The Janitor and The Twin Chefs rely on sound and proximity detection. Moving slowly while crouched reduces noise and keeps you hidden under tables, inside drawers, or behind environmental cover. Jumping and grabbing ledges often form the core of platforming puzzles, miss a ledge grab, and you’ll fall to your death.
One mechanic that trips up new players: holding the grab button. You need to hold it to maintain grip on ledges, objects, and climbable surfaces. Release too early, and Six will drop. This applies to pulling levers, dragging boxes, and hanging from hooks.
Lighter usage is limited but critical. Press the lighter button (L1/LB/Q by default) to illuminate dark areas. The flame reveals hidden paths and interactable objects, but it also makes Six more visible to enemies. Use it sparingly in stealth sections.
Collectibles Overview: Nomes and Statues
Little Nightmares features two collectible types: Nomes and Statues. Nomes are small, cone-headed creatures scattered across chapters. Hugging all of them unlocks the “Big Appetite” achievement. There are 13 total, and they’re easy to miss if you rush through areas.
Statues are creepy figurines hidden in each chapter. Breaking all of them (there are also 13) earns the “Highly Sprung” achievement. They’re usually tucked in corners, behind objects, or in rooms slightly off the main path. Most little nightmares 1 walkthrough guides mark these precisely because backtracking is impossible once you leave a chapter.
Collectibles don’t affect the story or unlock alternate endings, but they’re essential for completionists. If you’re aiming for 100% achievements, pause at each major area and explore thoroughly before progressing. The game autosaves frequently, so you can’t reload to grab missed items in the same playthrough.
Chapter 1: The Prison Walkthrough
Escaping Your Cell and Navigating the Depths
Chapter 1 opens with Six waking in a suitcase inside a flooded prison cell. Crawl out and move right. Jump across the gap and climb the boxes to reach the vent above. This introduces the grab-and-climb mechanic early.
Once through the vent, you’ll enter a room with a lever. Pull it to open the underwater gate below. Drop into the water and swim right, then surface and climb the chain. The water sections are straightforward but establish the game’s deliberate pacing.
In the next area, you’ll encounter your first environmental hazard: falling planks. Time your jumps carefully when crossing gaps with unstable flooring. One mistimed jump sends you into the abyss.
Push the minecart to create a platform, then climb up and continue right. You’ll find a room with a cage elevator. Ride it down, then push the box left to create a stepping stone. Climb the shelves, grab the key from the top, and backtrack to unlock the door.
The next puzzle involves stacking boxes to reach a high ledge. Drag one box under the opening, then grab a second box and stack it. Climb up and squeeze through the gap. This box-stacking logic repeats throughout the little nightmares gameplay, so get comfortable with it.
Before leaving the Prison, search for Nome #1 hiding in a side room after the elevator section. Approach slowly and hug it by holding the interact button.
Avoiding The Janitor’s Long Arms
The Janitor is Chapter 1’s primary threat. He’s blind but relies on sound to detect Six. His grotesquely long arms can sweep under beds, into vents, and around corners, making hiding spots less safe than they appear.
Your first encounter happens in the bathroom area. Crouch and move slowly across the wet floor. If you sprint, the splashing alerts him. Use the lockers and crates as cover, but don’t linger, he’ll eventually check hiding spots if he’s suspicious.
The library section is the toughest stealth sequence in Chapter 1. The Janitor patrols between bookshelves, and you need to push a cart to reach the exit. Wait for him to move away before pushing. The cart makes noise, so time it when he’s at maximum distance. If he hears you, sprint to the nearest hiding spot and hold still.
The final Janitor encounter involves a plank trap. Lure him onto the weak flooring by making noise (sprint briefly), then sprint away before he grabs you. He’ll fall through, removing the threat. Detailed strategies for this section can be found in comprehensive stealth guides, especially for players struggling with enemy patrol patterns.
Continue through the vent to complete Chapter 1. You’ll surface in a new area, setting up the transition to Chapter 2.
Chapter 2: The Lair Walkthrough
Puzzle Solutions and Stealth Tactics
Chapter 2 begins in The Janitor’s workshop, filled with shoes and leather scraps. The first puzzle involves climbing a stack of suitcases to reach a high vent. Simple platforming, but pay attention to falling objects, some luggage will topple if you climb carelessly.
The elevator shaft section requires pulling a lever to call the elevator, then quickly jumping onto it as it descends. Timing is tight: hesitate and you’ll miss the platform. Ride it down, then climb the pipes on the right wall.
You’ll enter a room with hanging cages. Jump onto the first cage to swing it, then leap to the next platform. Physics-based puzzles like this require momentum, wait for the cage to swing toward your destination before jumping.
The Janitor reappears in the toy room. He’s more aggressive here, actively patrolling narrow spaces. Use the shelving units as cover, but don’t stay in one spot too long. When he bends down to inspect the floor, that’s your window to sprint past.
One trick: throw objects (grab them and release the button while moving) to create noise distractions. Toss a toy to the left while you sneak right. The Janitor will investigate the sound, giving you a clear path.
The conveyor belt puzzle near the end of Chapter 2 involves timing your jumps between moving platforms. Wait for the belt to carry boxes into position, then hop across. There’s no rush, falling here means instant death, so wait for the safe moment.
Finding All Hidden Nomes in The Lair
Chapter 2 hides three Nomes. Nome #2 is in the workshop at the start, hiding behind a crate near the left wall. Nome #3 appears in the room with the hanging cages, look for a small opening in the lower-left corner. Crawl inside and hug the Nome before it runs away.
Nome #4 is in the elevator shaft area, tucked inside a side room accessible after pulling the lever. You’ll need to backtrack slightly after calling the elevator. Many little nightmares 1 walkthrough resources emphasize these missable collectibles because the game doesn’t allow chapter select without completing the full story first.
After escaping the Janitor one last time, you’ll climb into a vent and transition to Chapter 3. The Lair is the shortest chapter, but its stealth sections are unforgiving.
Chapter 3: The Kitchen Walkthrough
Surviving the Twin Chefs
Chapter 3 introduces the Twin Chefs, a pair of obese cooks who patrol the kitchen with cleavers and ladles. They’re faster than the Janitor and work together, making stealth more complex. One Chef often blocks your path while the other patrols, forcing you to time movements carefully.
The opening area is the freezer room, filled with hanging meat. Crouch and move between the carcasses to stay hidden. The first Chef patrols here, wait for him to turn away, then sprint to the next cover point. Don’t try to outrun him in open space: he’s surprisingly quick.
The kitchen prep area requires solving a box puzzle while avoiding the second Chef. Push the box under the counter, climb up, and crawl through the vent. The Chef will patrol near the vent entrance, so time your exit carefully. If he spots you, immediately sprint to a hiding spot (under tables or inside cabinets).
The boiling pot section is notorious. You need to climb a series of shelves while the Chefs move below. If you knock over bottles or make loud noises, both Chefs will converge. Move slowly and wait for them to spread out again before climbing higher.
One of the most challenging sequences in horror games involves escaping the kitchen through a dumbwaiter. You need to activate the lift, ride it up, then jump onto a moving platform. The timing is strict, jump too early or too late, and you’ll fall into the Chef’s grasp.
Navigating the Meat Locker and Preparation Areas
The meat locker section near the start of Chapter 3 is claustrophobic and dark. Use your lighter sparingly to spot climbable hooks and ledges. You’ll need to jump between hanging meat to cross gaps, the swinging physics return here, so wait for momentum.
Nome #5 hides in the freezer behind a stack of crates. Nome #6 is in the kitchen prep area, inside a lower cabinet. Nome #7 appears in the pantry near the end of the chapter, tucked behind shelves. All three are easy to miss if you’re focused solely on escaping the Chefs.
The canned food puzzle requires stacking cans to reach a high vent. Grab cans from the shelves and pile them carefully. If the stack topples, the noise alerts the Chef. Build the stack against the wall for stability, then climb quickly.
After escaping the kitchen through the dumbwaiter, you’ll enter the Guest Area, transitioning to Chapter 4. Chapter 3 is the longest and most mechanically demanding, blending stealth, platforming, and environmental puzzles.
Chapter 4: The Guest Area Walkthrough
Evading the Ravenous Guests
Chapter 4 shifts tone dramatically. The Guests are grotesque, masked humanoids consumed by gluttony. Unlike previous enemies, they don’t patrol, they feast. If Six gets too close, they’ll grab and devour her in seconds.
The opening bathhouse area is relatively safe. Climb the luggage and navigate the flooded rooms. You’ll encounter the first Guest in the dining prep area. He’s hunched over food and won’t move unless you get within arm’s reach. Crouch and move along the opposite side of the room.
The dining hall is the chapter’s centerpiece. Dozens of Guests gorge themselves at long tables. You need to crawl under the tables, weaving between their legs. They’ll lunge if you bump into them or linger too long. The trick is to keep moving, don’t stop under the table. Identify the next gap and move decisively.
Some Guests will stand and walk toward food. Use these moments to sprint past while their backs are turned. The little nightmares gameplay here is less about stealth and more about situational awareness, track which Guests are distracted and which are alert.
The kitchen escape involves climbing onto the tables while Guests are distracted. Jump from table to table, avoiding their grabbing hands. One Guest will chase you near the exit, sprint to the door and squeeze through before he catches up.
Platforming Through the Dining Hall
The second half of Chapter 4 focuses on vertical platforming. After escaping the initial Guests, you’ll climb a series of chandeliers and platforms. The chandeliers swing when you land on them, so time your jumps as they swing toward the next platform.
Nome #8 is hidden in the bathhouse at the start of Chapter 4. Nome #9 appears in a side room accessible during the dining hall sequence, look for a small gap in the left wall. Both require detours from the main path, so experienced puzzle-platformer guides often mark these as missable.
The final Guest encounter happens in a narrow hallway. Multiple Guests block the path, and you need to bait them into lunging, then sprint past. If one grabs you, mash the interact button to break free (this only works once per encounter).
After climbing through a vent, you’ll reach The Lady’s Quarters, beginning Chapter 5.
Chapter 5: The Lady’s Quarters Walkthrough
Mirror Mechanics and Breaking the Lady’s Power
Chapter 5 introduces The Lady, the final antagonist. She’s elegant, silent, and deadly. Her face is concealed, and she kills Six instantly if she catches her. The core mechanic here is mirrors, The Lady recoils from her own reflection.
The opening area is The Lady’s bedroom. She patrols slowly, humming a haunting melody. You need to sneak past while she’s facing away. If she turns toward you, sprint to cover. Unlike previous enemies, The Lady doesn’t give chase immediately, she pauses, then teleports closer. This makes panic sprinting dangerous.
The mannequin room is disorienting. The Lady teleports between mannequins, and you need to identify which one is real. Watch for subtle movements, the real Lady’s dress sways slightly. When you spot her, move to the opposite side of the room and continue toward the exit.
Mirror puzzles begin in the wardrobe area. Grab a mirror (hold the interact button) and carry it. When The Lady approaches, face the mirror toward her. She’ll scream and recoil, giving you time to advance. You can’t sprint while holding the mirror, so plan your movements carefully.
The trickiest section involves navigating a narrow hallway with multiple corners. The Lady teleports ahead, forcing you to use the mirror repeatedly. Don’t drop the mirror, if you lose it, you’ll need to backtrack, and The Lady will close in.
Nome #10, #11, and #12 are scattered across The Lady’s Quarters. One hides in the bedroom, one in the mannequin room, and one near the final staircase. Nome #13 appears just before the final boss, making it the last collectible in the game.
Final Boss Strategy and Ending Explained
The final confrontation takes place in a circular room filled with mirrors. The Lady teleports aggressively, and you need to reflect her image repeatedly to weaken her. Each successful reflection causes her to stumble and teleport farther away.
The strategy: keep your back to the wall and rotate to track her position. When she materializes, aim the mirror at her face. After several reflections, she’ll collapse in the center of the room.
Approach her body, and Six will absorb The Lady’s power in a disturbing sequence. Six’s hunger overwhelms her, and she consumes The Lady, gaining her dark abilities. The screen flashes white, and Six’s eyes glow.
In the ending cutscene, Six walks through The Maw as the Guests collapse and die around her. She absorbs their life force, growing stronger. She exits The Maw onto a raft, staring into the distance as the screen fades to black.
The ending is intentionally ambiguous. Did Six escape, or did she become the new threat? The sequel, Little Nightmares II, explores this further, but the original game leaves it open to interpretation. Completing the game unlocks the ability to replay chapters for collectibles and achievements.
Achievement and Trophy Guide
Little Nightmares includes 13 achievements/trophies tied to collectibles, speedruns, and specific actions. Here’s the breakdown:
Story-Related (Unmissable):
- Wake Up: Complete the first chapter.
- Runaway: Complete the second chapter.
- Metropolis: Complete the third chapter.
- Refuge: Complete the fourth chapter.
- Six’s Song: Complete the fifth chapter.
Collectible-Related:
- Big Appetite: Hug all 13 Nomes. Missable, requires exploration in every chapter.
- Highly Sprung: Break all 13 statues. Also missable.
Action-Specific:
- Illuminated: Light all the lanterns in the Prison (Chapter 1). There are five total.
- Elusive: Escape the Janitor without getting caught in Chapter 2.
- Pacifist: Complete Chapter 3 without killing any leeches (the small creatures in the water sections).
- Prison Break: Free a Nome from a cage in Chapter 2.
Speedrun:
- Hard to the Core: Complete the game in under one hour without dying more than ten times. This is the hardest achievement and requires multiple practice runs.
DLC (Secrets of The Maw):
The DLC adds three additional chapters (The Depths, The Hideaway, The Residence) with their own achievements. These aren’t required for base game completion but add lore and backstory about The Maw.
For Big Appetite and Highly Sprung, use a collectible guide on your second playthrough. The game doesn’t support chapter select until you’ve completed it once, so missing a Nome or statue means replaying the entire game.
Speedrun Tips for Advanced Players
Speedrunning Little Nightmares requires routing optimization and precise execution. The world record sits under 40 minutes, but casual speedrunners can aim for sub-60 minutes to unlock Hard to the Core.
Key Time-Savers:
Skip Non-Essential Interactions: Don’t grab objects unless required for progression. Every grab animation costs seconds.
Optimize Box Puzzles: In stacking sections, position boxes in one smooth motion instead of adjusting multiple times.
Memorize Enemy Patterns: The Janitor, Chefs, and Lady have fixed patrol cycles. Learning their timing eliminates guesswork and failed attempts.
Jump Shortcuts: Some platforming sections allow for risky jumps that skip climbing. The Prison elevator area has a jump that saves ~10 seconds. Practice in casual runs before attempting in speedruns.
Death Management: You’re allowed ten deaths for the achievement. Use this buffer on high-risk skips. Restarting from a checkpoint is faster than playing cautiously through a long section.
Chapter-Specific Tips:
- Chapter 1: Don’t kill the Janitor with the plank trap. Just run past him, the trap animation wastes time.
- Chapter 2: The conveyor belt section allows you to skip the first platform with a precise jump. High risk, high reward.
- Chapter 3: Ignore the freezer Nome. Collectibles add 2-3 minutes per chapter.
- Chapter 4: In the dining hall, sprint under tables instead of crouch-walking. Guests react slowly if you keep moving.
- Chapter 5: Practice mirror reflections on The Lady. Fumbling the mirror costs more time than any other mistake.
Practice Tools: Little Nightmares doesn’t have built-in timers, so use external tools like LiveSplit to track splits. Focus on consistency over risky skips until you’re comfortable with the route.
Speedrunning communities on YouTube and Twitch showcase advanced strategies and glitch routes. The game’s physics occasionally allow wall clips and out-of-bounds skips, though these are banned in most leaderboard categories.
Conclusion
Little Nightmares is a masterclass in atmospheric horror and environmental storytelling. This walkthrough has covered every chapter, puzzle, enemy encounter, and collectible to help you survive The Maw and unlock all achievements. Whether you’re running through for the story, hunting Nomes, or pushing for a speedrun, the game rewards patience, observation, and precise execution.
The ambiguous ending leaves plenty of room for interpretation, and the DLC chapters expand the lore if you’re hungry for more. Six’s journey is dark, unsettling, and unforgettable, and now you’ve got the tools to see it through to the end.